The Heart Behind the Meals
Quick dinners, affordable comfort food, and family-friendly recipes for the nights when takeout almost won.
Recipes
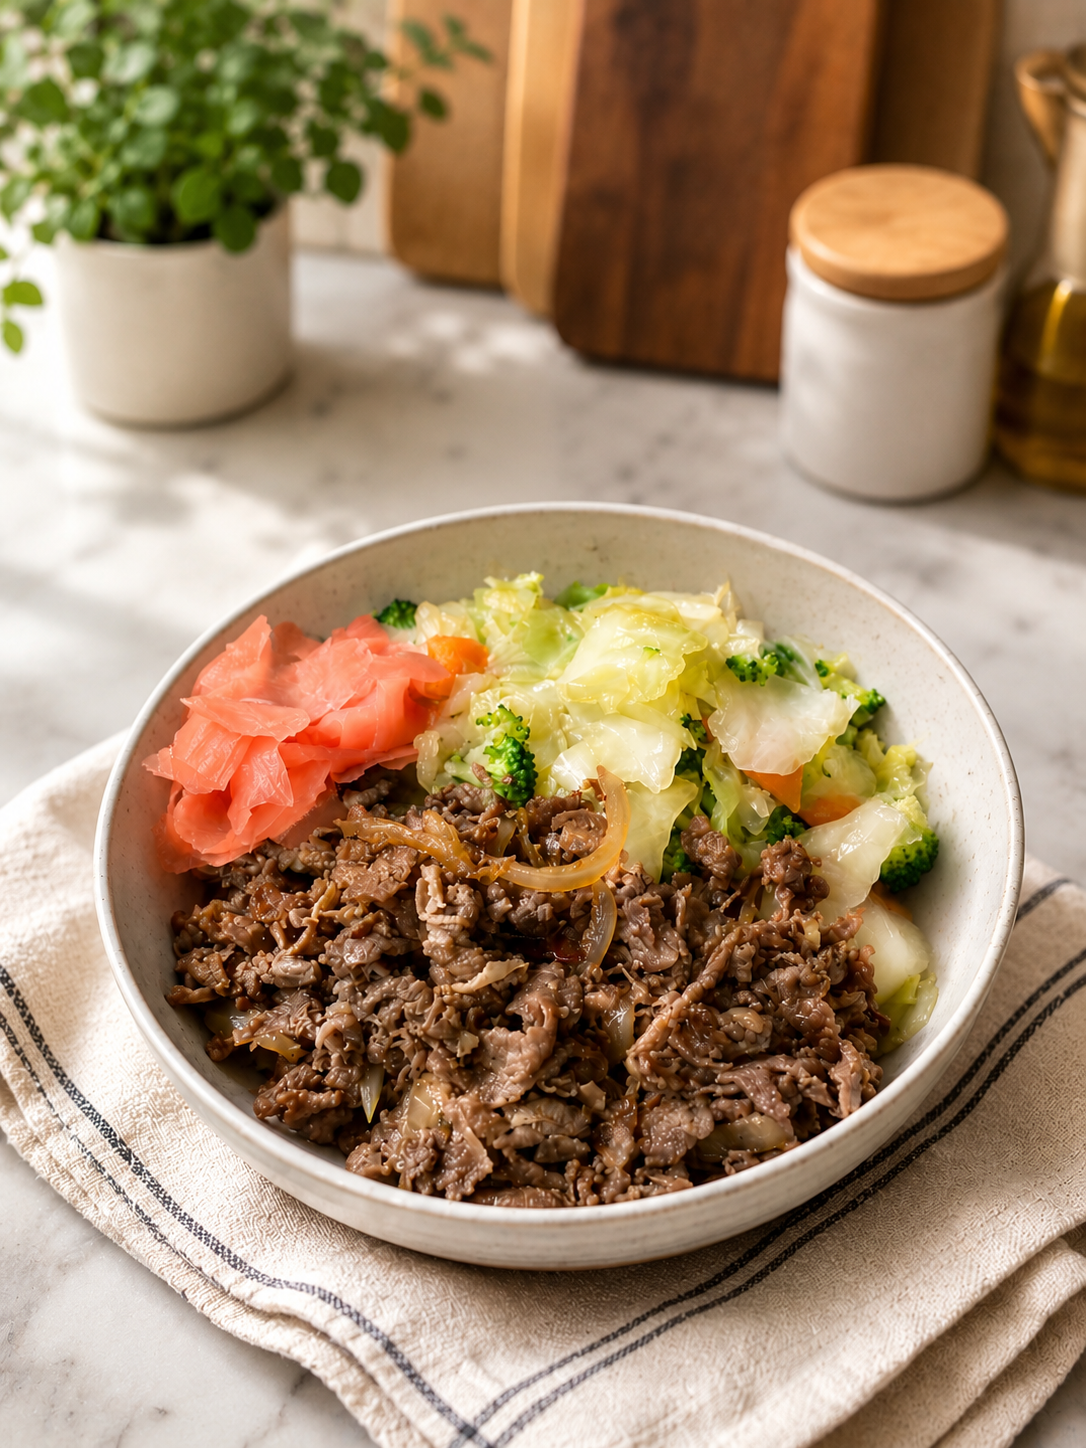
Kid-Approved Gyudon (AKA: Yoshinoya inspired beef bowl )
If you’ve ever made dinner, turned around for TWO seconds, and suddenly heard
“Mom… I don’t like onions… this recipe is for you.
Let me introduce you to your new secret weapon:
Kid-Approved Gyudon (Japanese Beef Bowl)
It’s:
– Quick
– Budget-friendly
– Sneaky-healthy
– And somehow… magically disappears
Let’s be real—kids are tiny food critics with very strong opinions.
This bowl wins because:
– The beef is sweet + savory (aka NOT scary)
– The rice is plain, fluffy, and safe
– The onions?
→ We either cook them down until invisible
→ OR chop them so small they lose their identity completely
Translation: No complaints. Just chewing.
Kid-Friendly Adjustments
- Skip visible onions OR dice them super tiny
- Go light on sauce if your kids don’t like “wet” foods
- Serve everything separately if needed (we don’t judge here)
| Prep Time: 10–15 minutes Cook Time: 10 minutes Total Time: ~20 minutes | Total cost: about $12–$16 Feeds: 3–4 people Cost per bowl: $3–$5 |
Ingredients: (Simple + Flexible)
– 1 pound thinly sliced beef
– 1 onion (optional…)
– Cooked white rice
– Soy sauce
– Mirin (or a little sugar + splash of vinegar)
– Broth (chicken or beef works great)
Instructions:
1. Cook the Rice
Prepare white rice according to package directions and set aside.
2. Slice the Onion
Thinly slice the onion or dice it extra tiny for picky eaters.
3. Cook the Onion
Add onions to a skillet with a small splash of oil or broth.
Cook until soft and slightly caramelized.
4. Add the Beef
Add thinly sliced beef to the pan and cook until browned.
5. Make the Sauce
Pour in soy sauce, mirin, and broth.
Let everything simmer together for a few minutes until the beef is tender and coated in sauce.
6. Build the Bowls
Scoop rice into bowls and top with the beef mixture.
Serve warm and prepare for suspicious silence from children who are suddenly too busy eating to complain.
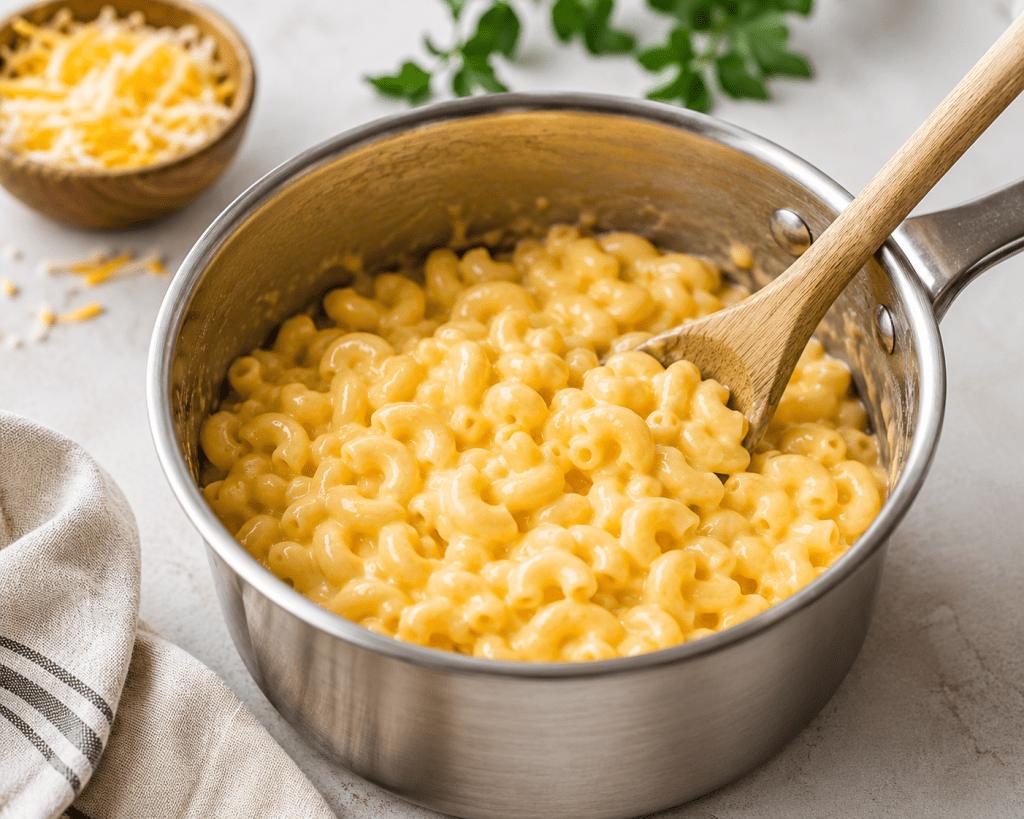
2 in 1 Macaroni and Cheese…to bake or not to bake…no, seriously
Because sometimes the only thing standing between total household destruction and peace… is a giant pot of cheesy pasta.
And honestly? This recipe understands the assignment.
Whether you need quick stovetop mac and cheese because everybody is suddenly “starving” at the exact same time, or you want that baked, golden, cheesy comfort food straight from the oven — this recipe gives you both options.
One recipe. Two ways. Zero extra stress.
Make it creamy and scoop it straight from the pot for an easy weeknight dinner, or bake it until bubbly and cheesy on top when you want full comfort-food energy.
No fancy ingredients. No complicated steps. Just rich, creamy, budget-friendly macaroni and cheese that disappears faster than you can say, “Who took the last scoop?”
Kid-Friendly Adjustments
- Cut noodles a little smaller for younger kids or use their favorite pasta.
- Add extra cheese if your kids believe “too cheesy” is impossible.
- Serve with hot dogs, chicken nuggets, or broccoli if you’re pretending balance exists.
| Prep Time: 10 minutes Cook Time: 15–20 minutes Total Time: 25–30 minutes | Total Cost: $12-$15 Feeds: 6-8 people Cost per person: $1.75-$2.50 |
Ingredients:
1 box macaroni noodles
2 cups Velveeta cheese
2 cups shredded Colby Jack cheese
2 cups milk
4 tablespoons butter
Instructions: In 3 easy steps!
1. Cook the Pasta
Boil macaroni noodles according to package directions. Drain and set aside.
2. Make the Cheese Sauce
In a pot over medium heat, melt butter.
Add milk and cubed Velveeta cheese. Stir until smooth and creamy.
Mix in some of the shredded Colby Jack cheese.
3. Combine Everything
Pour cheese sauce over the noodles and stir until fully coated.
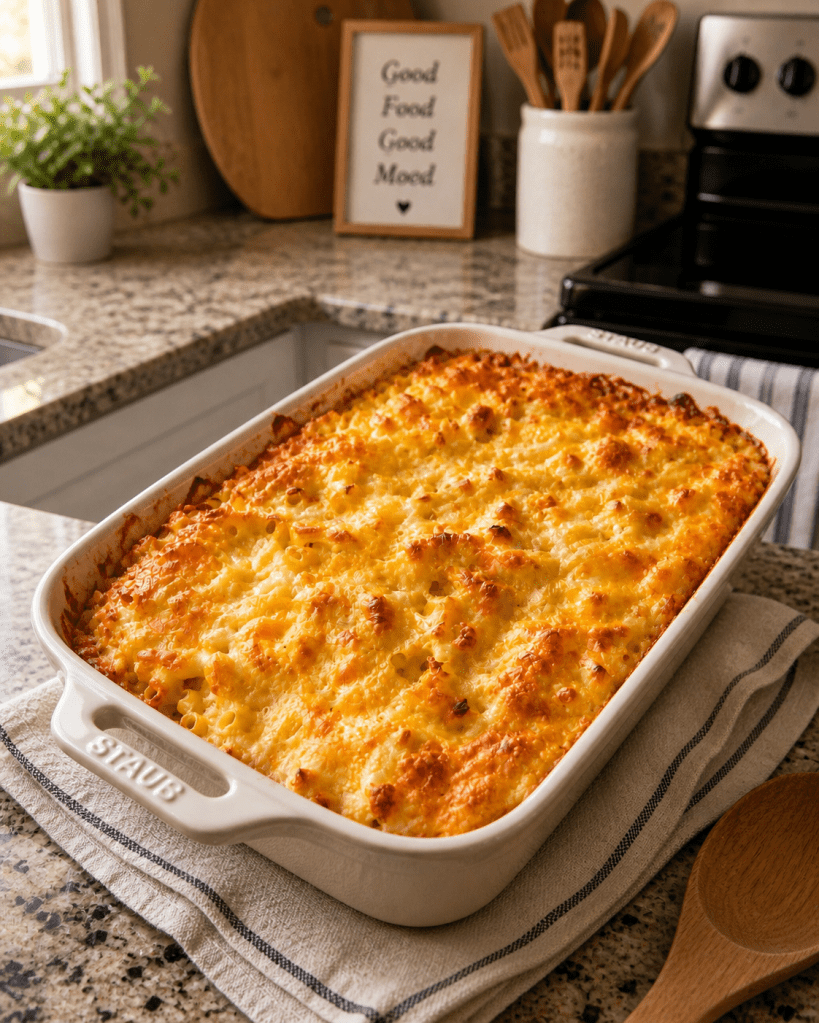
Got time to bake?
Turn this into the ultimate comfort food by popping it in the oven for that golden, bubbly, cheesy top layer everybody fights over first.
Busy Mom Tip:
Save leftovers in individual containers for quick lunches the next day. Because nothing feels more rewarding than opening the fridge and realizing tomorrow’s lunch is already handled. Less stress, less spending, and nobody asking, “What can I eat?” every 12 minutes.
| Prep Time: 15 minutes Cook Time: 45 minutes Total Time: 1 hour | Total cost: $14-$18 Feeds: 6-8 people Cost per person: $2-$3 |
Ingredients:
1 box macaroni noodles
16 oz block Velveeta cheese, cubed
2 cups shredded Colby Jack cheese
2 cups milk
4 tablespoons butter
2 eggs
2 tablespoons sugar
Extra shredded cheese for topping
Instructions
1. Cook the Pasta
Boil macaroni noodles according to package directions. Drain and set aside.
2. Make the Cheese Sauce
In a large pot, melt butter over medium heat.
Add milk and Velveeta cheese. Stir until smooth and creamy.
Mix in part of the shredded Colby Jack cheese.
3. Make the Egg Mixture
In a separate bowl, whisk together eggs and sugar.
Add cooked noodles and mix gently to coat. Make sure noodles are cooled off.
4. Combine Everything
Pour cheese sauce over the noodles and stir until fully combined.
Transfer mixture into a greased baking dish.
5. Add Cheese on Top
Sprinkle remaining shredded cheese over the top.
6. Bake
Cover with foil. Bake at 375°F for 45 minutes until hot and bubbly. Remove foil the last 10 minutes for golden edges.
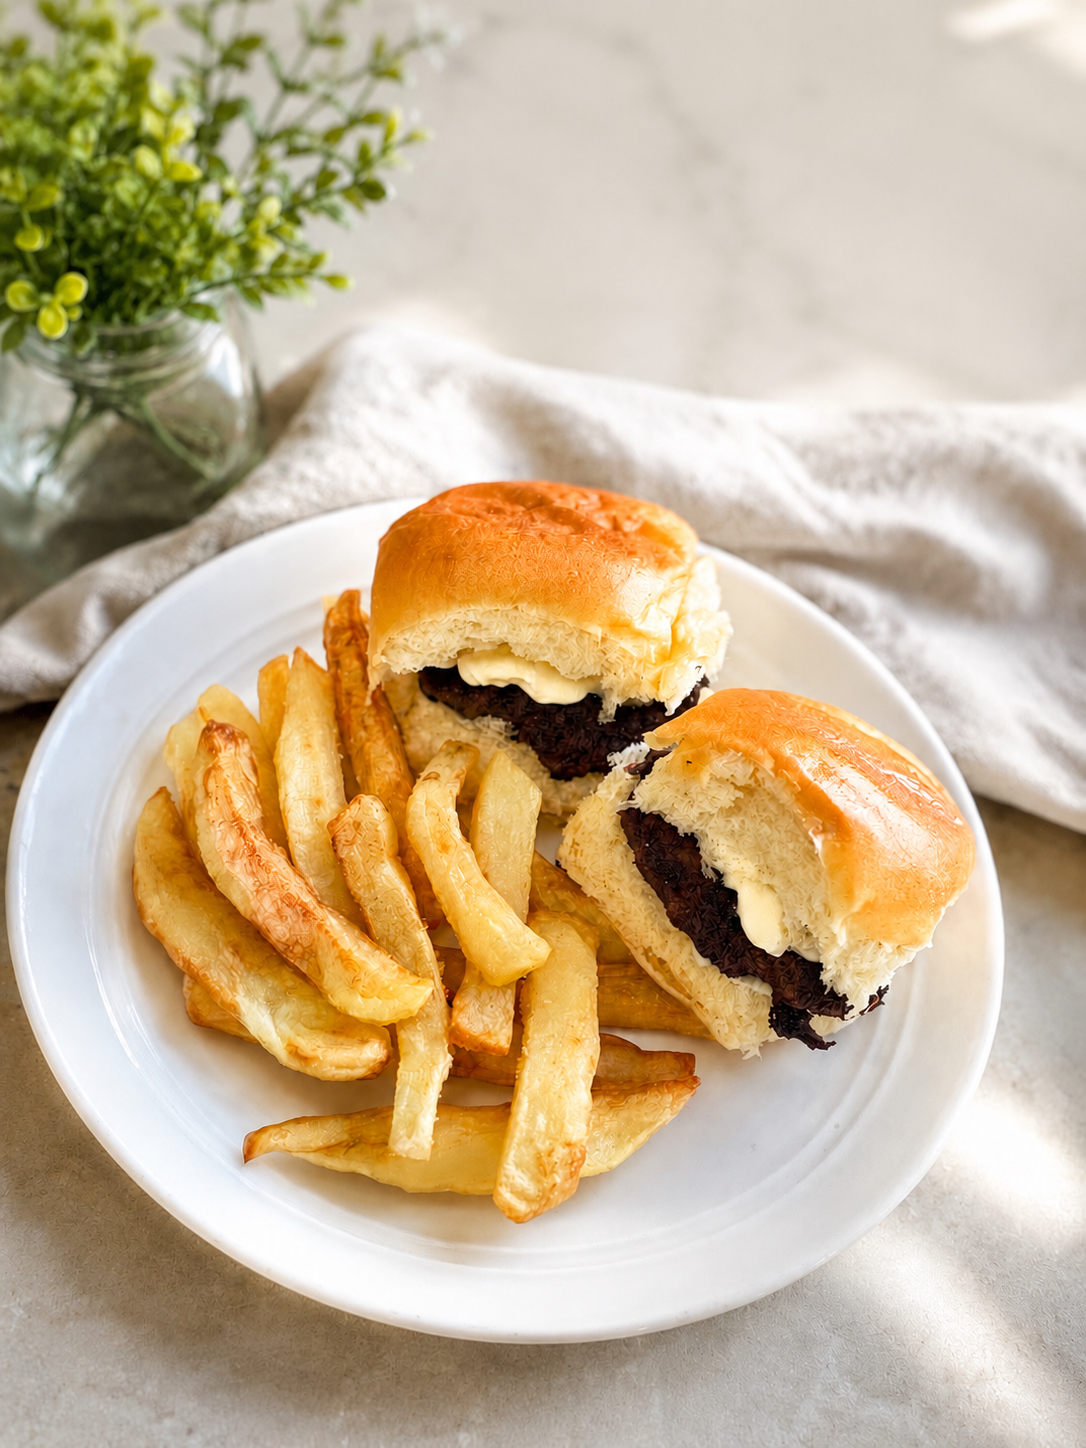
Mini Smash Burgers for the WIN!
Here are a few quick tips to help you win this dinner battle without losing your sanity
- Use an ice cream scooper to make quick, even burger balls.
- The smaller the smash burgers, the faster they cook.
- Add their favorite sauce and suddenly dinner becomes “the best thing ever.”
- Pair it with a safe side they already love — fries, fruit, chips, anything counts on survival nights.
- Don’t overthink dinner. Fed kids and a peaceful evening is the real victory
| Prep Time: 10 minutes Cook Time: 15 minutes Total Time: 25 minutes | Total Cost: $12-$15 Feeds: 4-6 people Cost per person: $2.50-$4 |
Ingredients:
1 pack of Hawaiian rolls
1 lb ground beef
McCormick burger seasoning (season to your heart’s desire)
Cheese slices
Instruction: Straight to the point
1. Make small meatballs
Using an ice cream scooper would come in handy
2. Smash them flat on hot pan
3. Season while in pan and cook for 2-3 minutes on each side.
4. Melt cheese on patty
5. Assemble burgers and add any sauce you’d like
- Mayo
- Ketchup
- Secret Sauce (ketchup+mayo+mustard)
- BBQ Sauce
Quick and easy. Now all you have to do is clean the kitchen, make sure everyone showers before bed and get everyone to bed at a decent hour. Congratulations to winning another battle in the kitchen.
Easy Teriyaki Chicken Bowls
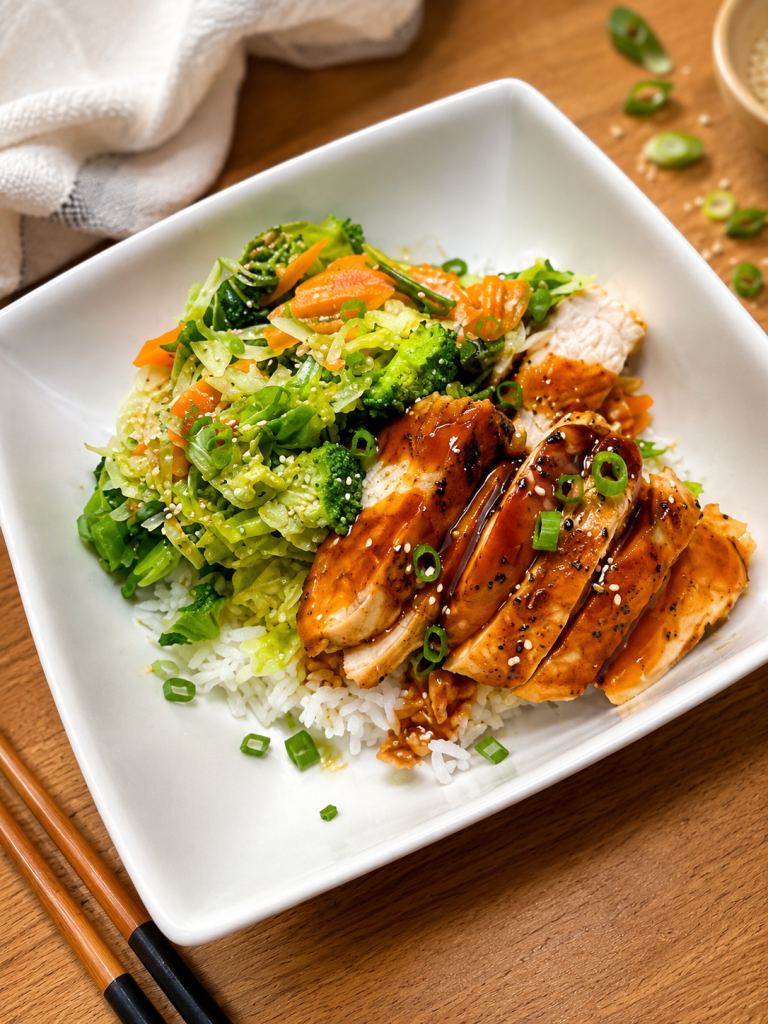
Some nights dinner feels like a full-time job all by itself, especially when everyone’s hungry, tired, and suddenly extremely passionate about what they don’t want to eat. That’s exactly why these Teriyaki Chicken Bowls became a win in our house. They’re quick, easy, full of flavor, and simple enough for busy weeknights when you don’t have the energy for anything complicated.
The sweet teriyaki sauce keeps the kids happy, the rice makes it filling, and adding vegetables helps balance things out without turning dinner into a negotiation battle. Best part? Everything comes together in about 30 minutes, which means less stress in the kitchen and more time pretending we have our lives together.
| Prep Time: 10 minutes Cook Time: 20 minutes Total Time: 30 minutes | Servings: 4-6 people Cost Per Person: $3-$4 Total Cost: $16-$20 |
Ingredients:
2lbs of chicken breast
2 cups of rice
1 bag of mixed stir-fry vegetables
your favorite teriyaki sauce
Salt and pepper to taste
Instructions:
1. Cook the Rice
Rinse rice if desired, then cook according to package instructions. Set aside once fluffy and ready.
2. Season the Chicken
Season both sides of the chicken breast with salt and pepper.
3. Cook the Chicken
In a large pan over medium heat, cook chicken for about 6–8 minutes per side or until fully cooked and golden brown.
4. Add the Teriyaki Sauce
Pour teriyaki sauce over the chicken and let it simmer for a few minutes until the sauce thickens slightly and coats the chicken.
5. Cook the Vegetables
In a separate pan, cook the mixed stir-fry vegetables according to package instructions until tender but still colorful and slightly crisp.
6. Slice & Assemble
Slice the chicken into strips. Add rice to each bowl, top with vegetables, then place chicken on top. Drizzle with extra teriyaki sauce if desired.
Quick Mom Tips
- Anything with sauce instantly becomes “the best dinner ever” according to children.
- Add broccoli, cabbage, or carrots for extra veggies without complaints.
- Want to save time? Use microwave rice packets.
- Leftovers taste amazing the next day.
- If your kids suddenly decide they “don’t like chicken,” just add extra sauce and try again tomorrow.
Kid-Friendly Adjustments
- Cut chicken into smaller bite-sized pieces for younger kids.
- Serve sauce on the side for picky eaters.
- Add extra rice if your household treats rice like a full personality trait.
French Toast Without the Morning Chaos
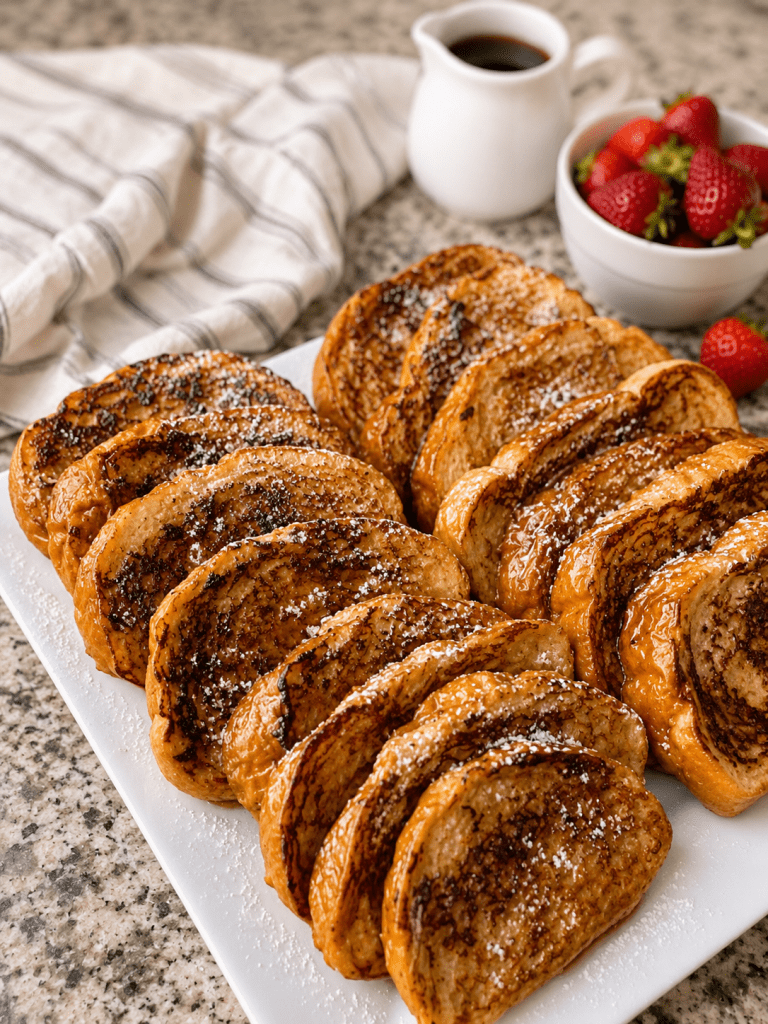
A Busy Mom’s Favorite Freezer Breakfast Hack
There was a time when my daughter requested French toast every single morning. Not once in a while. Not on weekends. Every. Single. Morning. As a full-time stay-at-home mom with little ones running around, I was already spending half my life in the kitchen making breakfast, snacks, lunch, and dinner. So I came up with a simple solution: make a huge batch at once and freeze it. Now whenever someone wants French toast, all I have to do is pop a few slices into the toaster oven, air fryer, or microwave and breakfast is ready in minutes. It’s easy, affordable, kid-approved, and perfect for busy mornings.
| Prep Time: 15 minutes Cook Time: 45 minutes Total Time: 1 hour | Servings: 16-20 slices Estimated Total Cost: $8-$10 Cost Per Serving: $0.50 – $0.63 per serving |
Ingredients
2 loaves freshly baked French bread
5 large eggs
2 cups milk
2 teaspoons vanilla extract
2 teaspoons ground cinnamon
1/2 cup of sugar
4 tablespoons butter (plus more as needed for cooking)
Instructions
Step 1
Slice both loaves of French bread into fairly thick slices.
Step 2
In a large bowl, whisk together:
- Eggs
- Sugar
- Milk
- Vanilla extract
- Cinnamon
Mix until fully combined.
Step 3
Heat a large skillet or griddle over medium-low heat.
Add a small amount of butter and allow it to melt.
Step 4
Dip each slice of bread into the egg mixture one at a time, coating both sides.
Place immediately onto the hot skillet.
Step 5
Cook until golden brown, then flip and cook the other side until golden.
Continue adding small amounts of butter as needed to prevent sticking and add extra flavor.
Step 6
Transfer cooked French toast to a cooling rack or baking sheet.
Allow slices to cool completely.
Step 7
Place cooled French toast into large freezer-safe zip-top bags.
Label with the date and freeze for up to 6 months.
Reheating Instructions
| Toaster Oven Heat 4-6 minutes or until warm | Air Fryer Heat at 350F for 3-5 minutes | Microwave Heat 30-60 seconds depending on quantity |
Kid-Friendly Adjustments
Cut into sticks for toddlers.
Sprinkle with powdered sugar.
Serve with fresh strawberries or sliced apples.
Add scrambled eggs for extra protein.
Let kids dip them in maple syrup, yogurt, or fruit puree.
